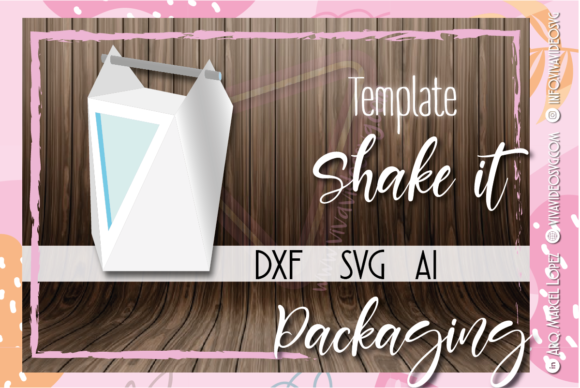
FACETED BOX for STICK: The Smart Choice for Custom Candy Bars and Party Surprises
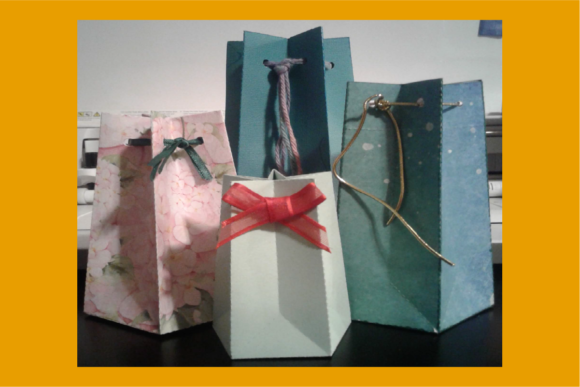
There is a specific moment in event planning when the difference between a generic treat and a memorable gift becomes clear. It happens when you hand over a standard wrapper versus a custom FACETED BOX for STICK. This isn't just about packaging; it is about the psychology of gifting. When you choose a faceted design, you are selecting geometry that catches light from every angle, creating an immediate sense of value and care. For adults aged 20 to 50 who manage small businesses, host parties, or simply love crafting, this design offers a professional edge that flat boxes cannot match.
However, many creators rush into digital downloads without understanding the technical nuances of vector files. They assume all box designs are created equal, leading to frustration during the cutting process or disappointment with the final assembly. To ensure your project succeeds, you must look beyond the pretty image and understand the file structure, the adaptation capabilities, and the specific requirements for candy bars.
Understanding the Design: Why Faceted?
The term "faceted" refers to the geometric planes that make up the box. Unlike a simple rectangular tube, a faceted box has angled sides that converge at the top or bottom. This shape provides structural rigidity that prevents the box from collapsing under the weight of a chocolate bar or a stick treat. More importantly, the facets create natural highlights and shadows, making the product inside appear more premium without needing expensive foil stamping or embossing.
When you download the FACETED BOX for STICK, you are not just getting a template; you are getting a tool for brand elevation. Whether you are selling homemade confections at a farmers market or preparing a corporate favor for a wedding, the visual impact of a multi-faceted container stands out on a crowded table. It signals to the recipient that attention was paid to detail, which increases the perceived value of the gift itself.
The Critical Importance of File Formats
One of the most common mistakes beginners make is purchasing a design without verifying the included file formats. A good digital product should be versatile enough to handle different software environments. With this specific design, you receive three distinct formats: DXF, SVG, and AI. Each serves a unique purpose in the production workflow.
- DXF (Drawing Exchange Format): This is essential if you use laser cutters or CNC machines. Many hobbyists own these machines but struggle to import files correctly. If you try to open a DXF in a word processor, it will fail. You need compatible software like AutoCAD, CorelDRAW, or specific laser cutter interfaces. Using the wrong software can result in distorted cuts or wasted material.
- SVG (Scalable Vector Graphics): This format is ideal for Cricut and Silhouette users. SVGs allow you to scale the design infinitely without losing quality. However, a frequent error is ignoring the layer settings within the SVG. If you do not separate the cut lines from the score lines, your machine might cut through the entire sheet instead of just scoring the fold lines, ruining the assembly.
- AI (Adobe Illustrator): This is the industry standard for professional designers. Having the AI file allows you to edit colors, add text, or adjust dimensions before sending the job to print. Beginners often overlook this, assuming they only need the ready-to-cut files. But what if you need to change the length of the stick holder? Only the AI source gives you that control.
Avoiding Common Pitfalls in Assembly
Even with perfect files, the physical construction of the box can go wrong. A major misunderstanding involves the assumption that paper behaves exactly like cardboard. While the FACETED BOX for STICK works beautifully with cardstock, using thin paper without proper scoring will lead to jagged edges and weak joints. The facets require precise folding angles; if the crease is not sharp, the box will not lock together securely.
Another overlooked detail is the window adaptation. The design includes a specific area intended for a transparent window. Users often cut the window too large, leaving insufficient paper around the edges to glue the film or acetate. Alternatively, some forget to account for the thickness of the adhesive tape used to secure the window, causing the box to bulge or the lid to not close properly. Always test a single unit with scrap material before committing to a full batch of expensive paper.
The Window Feature: A Surprise Element
The adaptation of the box with a window is a game-changer for party favors and special gifts. It allows the recipient to see the contents without opening the package, building anticipation. This is particularly effective for candy bars where the color of the chocolate or the branding of the wrapper adds to the allure. However, transparency requires a clean cut. If your cutting tool leaves rough burrs around the window, the transparency effect is ruined, and the box looks amateurish.
To avoid this, check your blade depth carefully. You want a clean slice through the paper but not deep enough to damage your cutting mat or leave fuzzy edges. If you are using a laser cutter, ensure the power setting is optimized for the specific thickness of your paper. Too much power burns the edges, while too little fails to cut through completely.
Evaluating Your Material Choices
Selecting the right paper is as important as choosing the right design. Many entrepreneurs buy the cheapest cardstock available to save money, only to find that the box feels flimsy and lacks the "faceted" structure required to hold its shape. For a stick-based treat, the box needs to support vertical pressure. A low GSM (grams per square meter) paper will bend, making the stick difficult to insert or remove.
I recommend testing materials with a minimum of 200 GSM for the main body and slightly thicker stock for the base if possible. If you are printing directly onto the paper, ensure your printer can handle the weight. Thick cardstock often jams standard home printers. In such cases, outsourcing the printing to a local shop while providing them the AI file is a safer bet for quality assurance.
Practical Steps for Success
Before you start cutting hundreds of boxes, follow this practical checklist to ensure efficiency and satisfaction:
- Verify Software Compatibility: Open the DXF, SVG, and AI files immediately after downloading to ensure they render correctly in your specific software version.
- Run a Scale Test: Measure the dimensions in your software against your actual paper size. Sometimes default settings include extra margins that waste material.
- Test the Window Cut: Cut one window piece and test the fit with your chosen acetate or plastic sheet before proceeding with the rest.
- Check Fold Lines: Ensure that score lines are distinct from cut lines in your file. If they are merged, you may end up cutting the folds rather than just marking them.
- Plan for Adhesives: Decide early how you will attach the window. Some designs work better with double-sided tape, while others require glue dots. Adjust your cutting plan accordingly.
By paying attention to these details, you transform a simple digital download into a high-quality product line. The FACETED BOX for STICK is designed to be user-friendly, but its success depends on the preparation of the creator. Avoid the trap of rushing the process. Take the time to understand the file formats, respect the material properties, and utilize the window feature effectively.
Whether you are a freelancer looking to expand your portfolio, a small business owner aiming to increase sales, or a hobbyist wanting to impress guests at a birthday party, this design offers the versatility you need. By avoiding the common pitfalls of poor file handling and material selection, you ensure that your final product reflects the quality of your effort. Remember, the goal is not just to package a treat, but to deliver an experience that people remember long after the candy is gone.